
The human body is such an intricate and fascinating thing- my little is totally enthralled with the immune system and blood and guts so I figured it was time we dove into some cool body science this week for our learning theme! I really wanted to do a system per day, but there are too many to cover in one week (circulatory, nervous, digestive, immune, respiratory, muscles, bones…) and I wanted to touch on all of them along with the 5 senses and ways to care for your body, at least in some aspect. I did try to do all the bone activities on one day, all the circulatory system activities on another day and so on, but some days there was overlap. Also, there are so many cool experiments to show how different parts of the body work, so I threw in a little extra science this week too! Don’t forget to skip on over to my toddler post “Head, Shoulders, Knees, and Toes” for more cool body themed art and play activities like a toilet paper tube stethoscope and dry erase teeth brushing!
–Literacy:
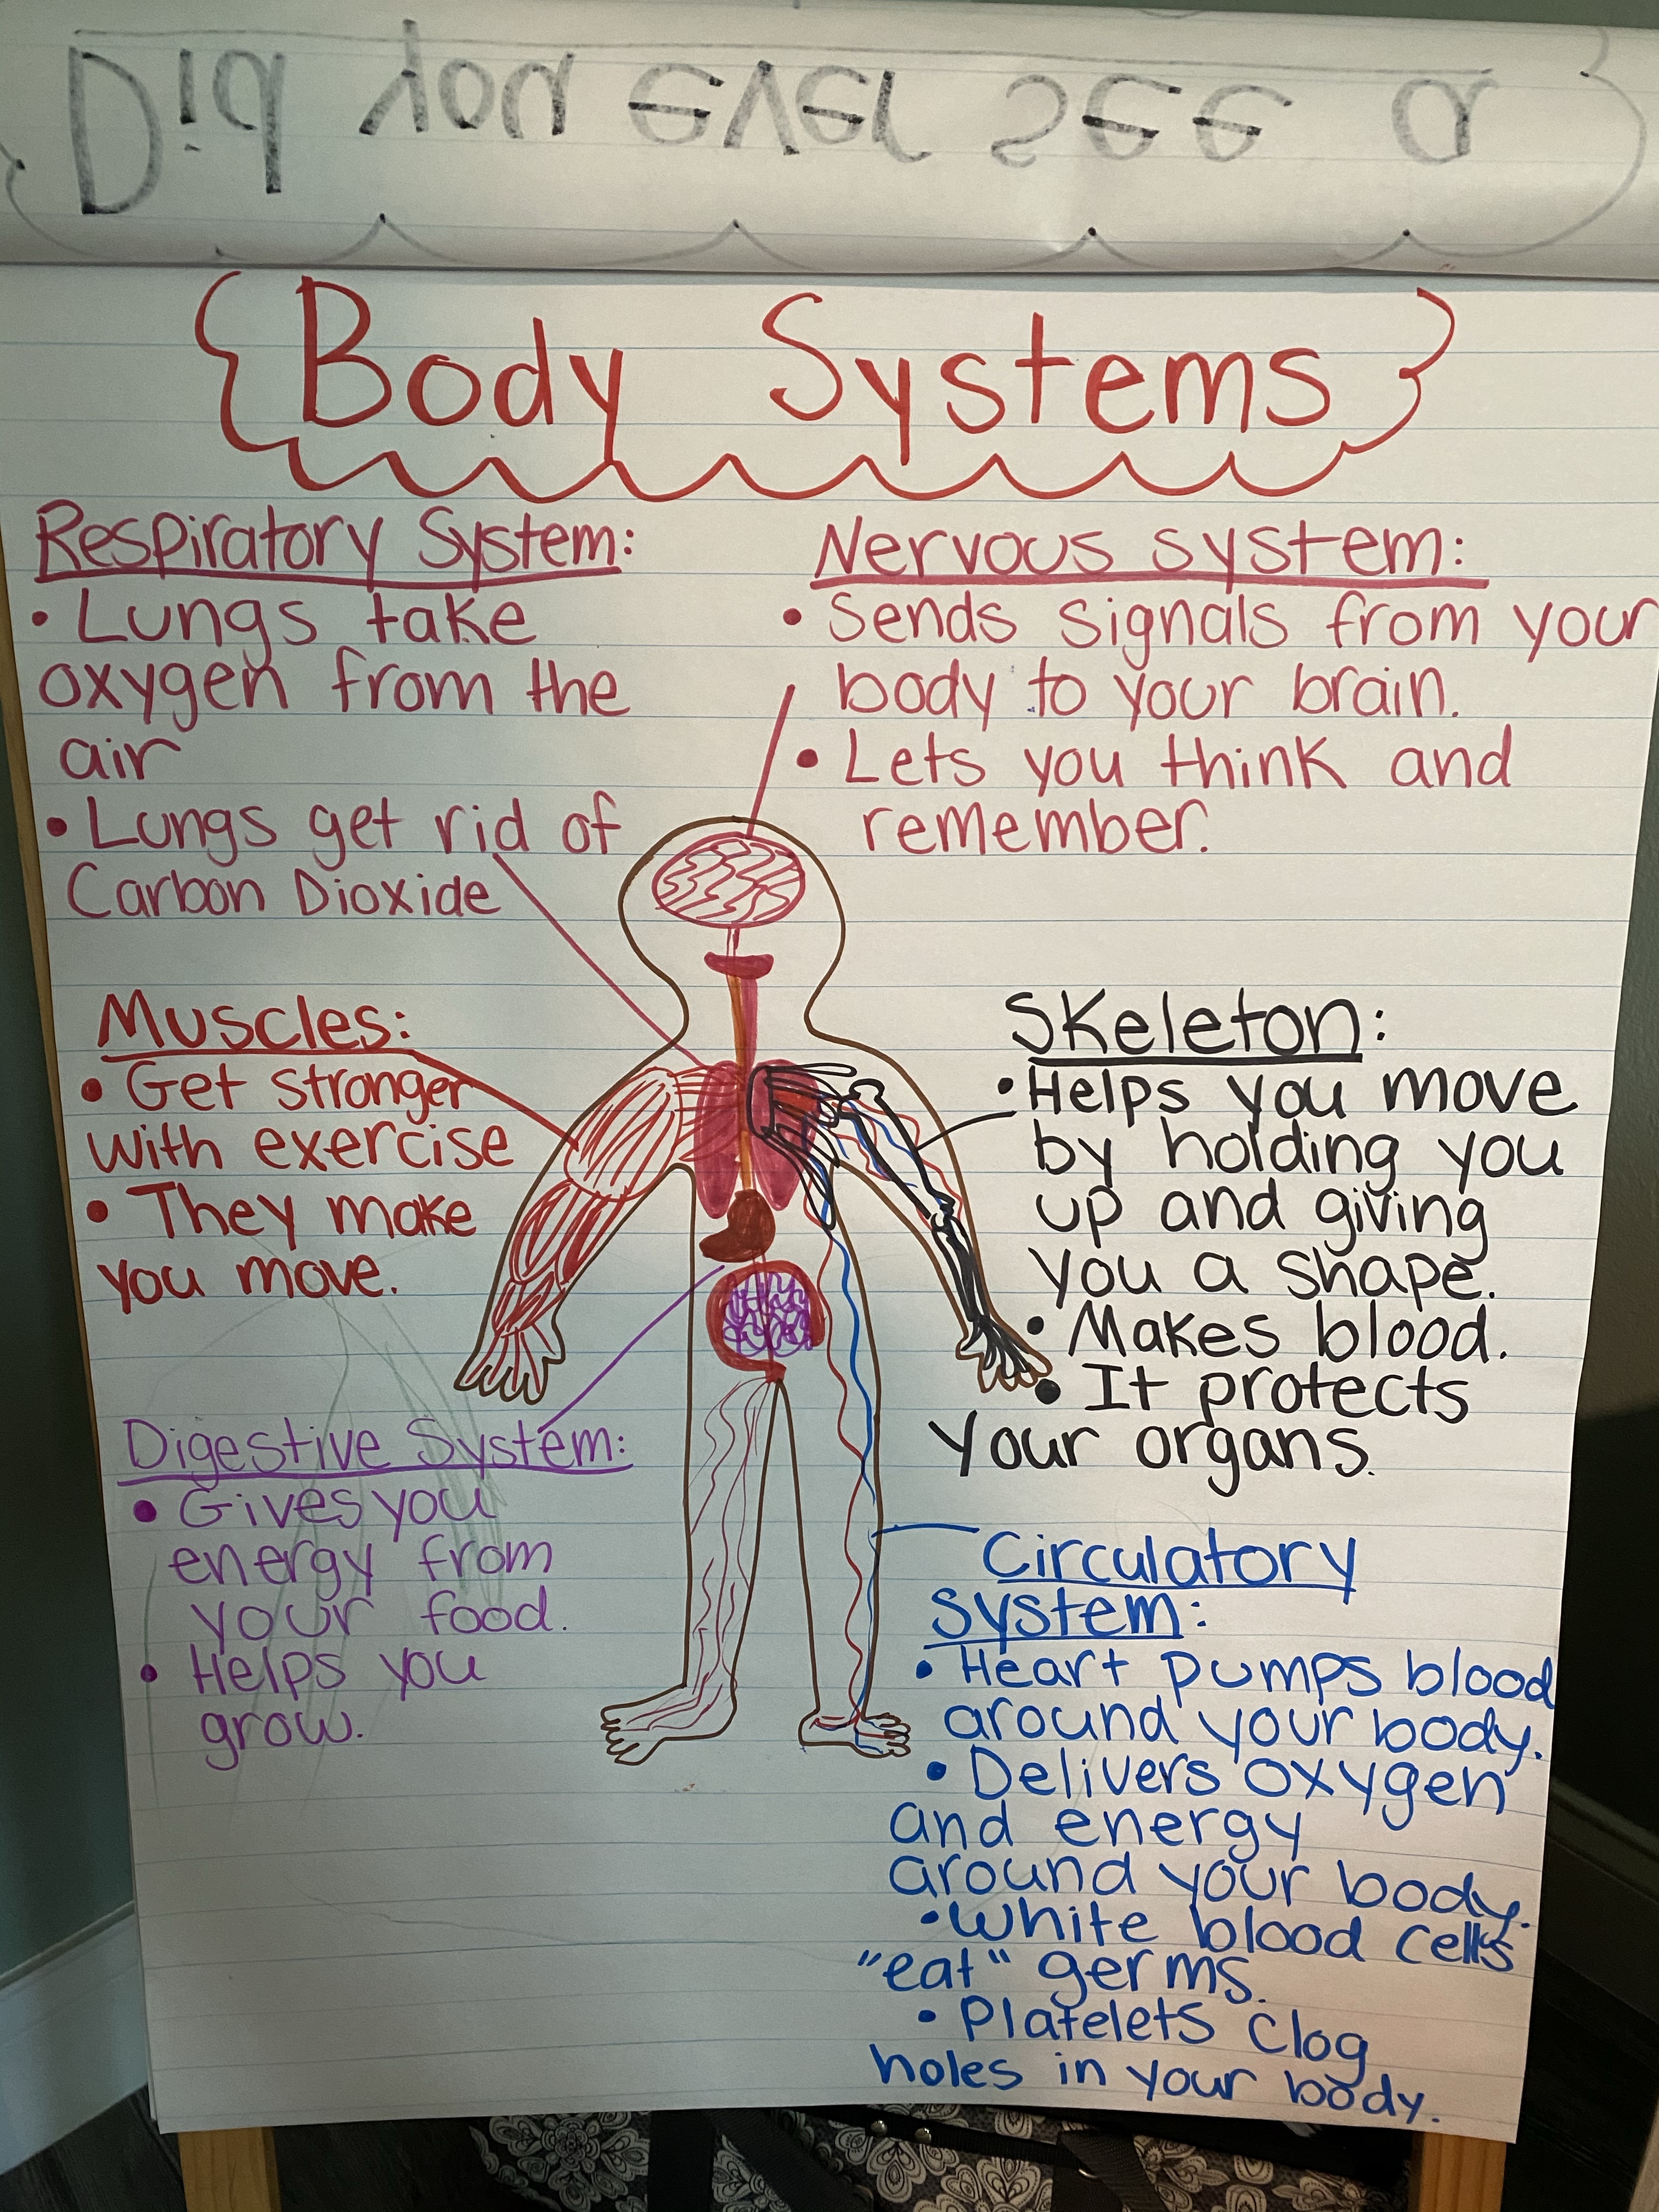
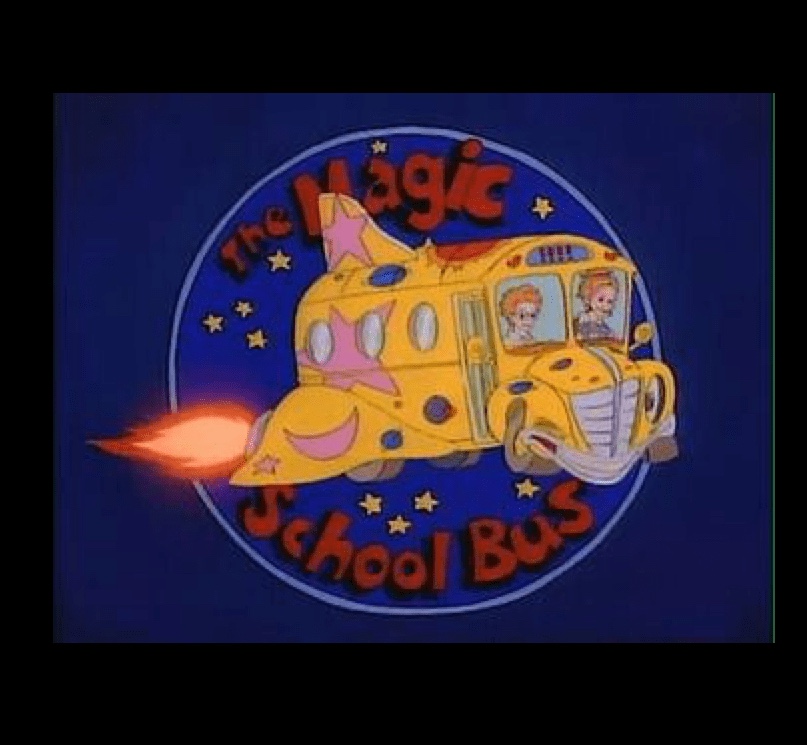
-Usborne Complete Book of the Human Body: Each day we read and talked about a body system or two in the “Usborne Complete Book of the Human Body”. We covered muscles and bones, the brain and senses, breathing and circulation, and digestion. Some of the book is a bit technical for preschoolers so I skipped over some parts and stuck to what my little could understand and would find interesting. After reading, I had my little tell me what each system did according to the text and I wrote it on a graphic organizer drawn on chart paper. You could also use the Magic School Bus Human Body, or if you get the squishy body man he comes with a book too!

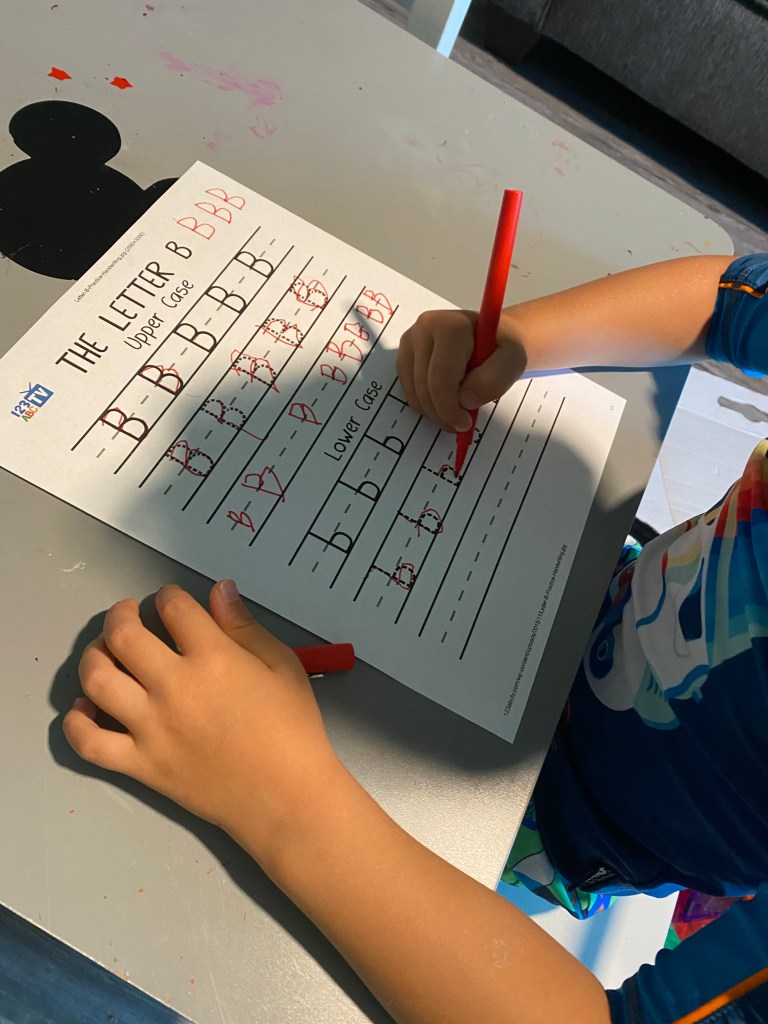
-B is for body: This week we focused on the letter B during calendar time. For one of the activities, I had my little practice writing and saying the letter B using this letter B writing practice page.
–Math:
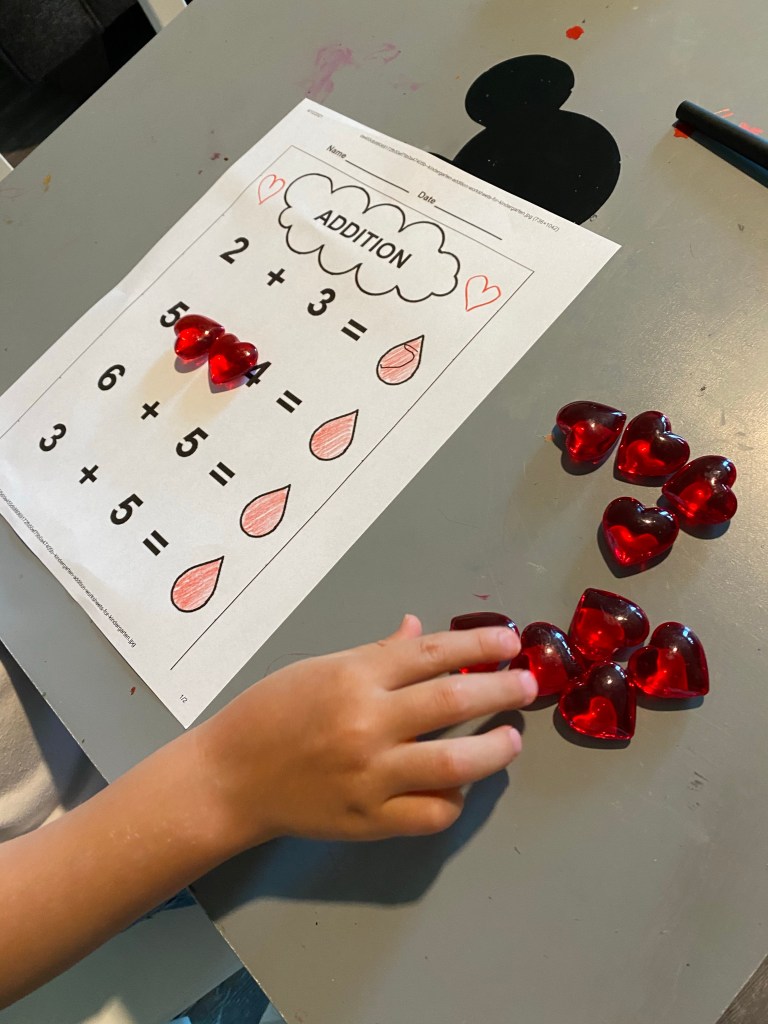
-Heart bead adding: So I got these heart shaped vase filler beads back when we did Grinch week and they’ve come in handy for our Valentine lessons- and now for the human body. I printed out this adding page (which I think was technically a cloud and raindrops, but I colored the raindrops red and we made it circulatory system themed! LoL) then had my little use the hearts as manipulatives to help him add (ie. he made each number with hearts, then counted them all together.)
-Heart beat counting and comparison: Show your little how to take their pulse by gently placing two fingers in the divot on their wrist under their thumb. If they can, have them count their heartbeats for one minute- you might have to take their pulse and count with them. Then take your own pulse for one minute and compare the numbers.

-Count and write body parts page: This was probably a smidge too easy for my little- he did the whole thing mostly by himself but it does work on counting and number recognition up to 10 as well as simple reading so I still think it was a good activity choice! Basically you have your little read each sentence, count that amount of body parts and write down the number for each. I got it from Anna Bustillo on Pinterest.

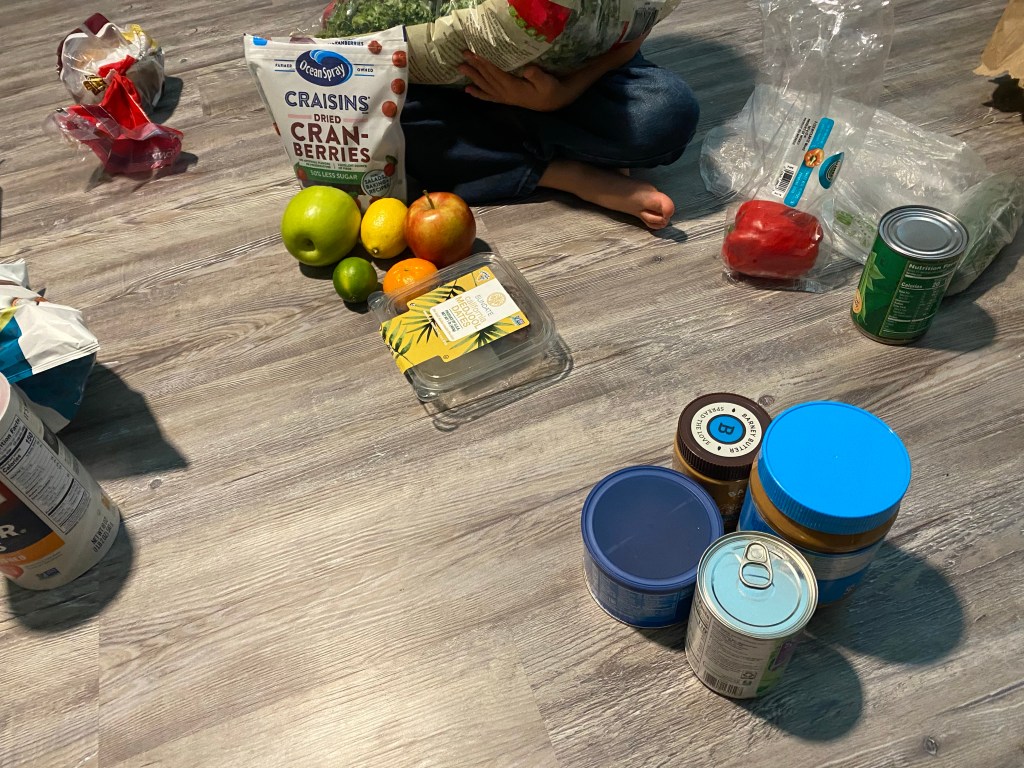
-Food group sort and count: Give your little a large array of healthy foods from your kitchen. Discuss the 5 main food groups together (fruits, veggies, protein, dairy and grains) and how eating healthy foods helps your body grow and stay…well…healthy! Then have your little sort the food into the food groups, count the amount of food in each group and match a flashcard number to the amount. Finally, have them count up all the food items and find the matching number.
–Science/Social Studies:
-:Magic School Bus” body episodes: Right now you can get the Magic School Bus on Netflix (usually it’s also available on YouTube) and they’re a great way to show complicated science concepts up close and in a way that is interesting and kids can understand. This week I let my little watch “The Magic School Bus Flexes its Muscles” (muscles and bones), “The Magic School Bus for Lunch” (digestive system), and “The Magic School Bus Inside Ralphie” (immune system).
-Life sized human skeleton: Ok this was super cool to do life sized, but it does take some prep time to draw and cut out all the bones according to your child’s size. In my classroom we used to do a simpler version with smaller bones like this (you’d probably still want to cut them out for your kiddo depending on their scissor skills, but that’s up to you!) glued to black construction paper. So for the life sized version, just draw, label and cut out all the major bones in your child’s body. Size them to your child to make sure they’ll fit on their body outline (to be traced later). We did: skull, mandible, vertebra, scapula, clavicle, ribs, sternum, humerus, radius, ulna, metacarpals, pelvis, femur, tibia, fibula, patella and metatarsals. (Yes, I’m a nerd and used the Latin names. And no I don’t expect my little to learn all those names at this point, but we may as well go over them!) Then, I traced my little’s body on butcher paper and we worked together to put the bones where they belonged on his body!

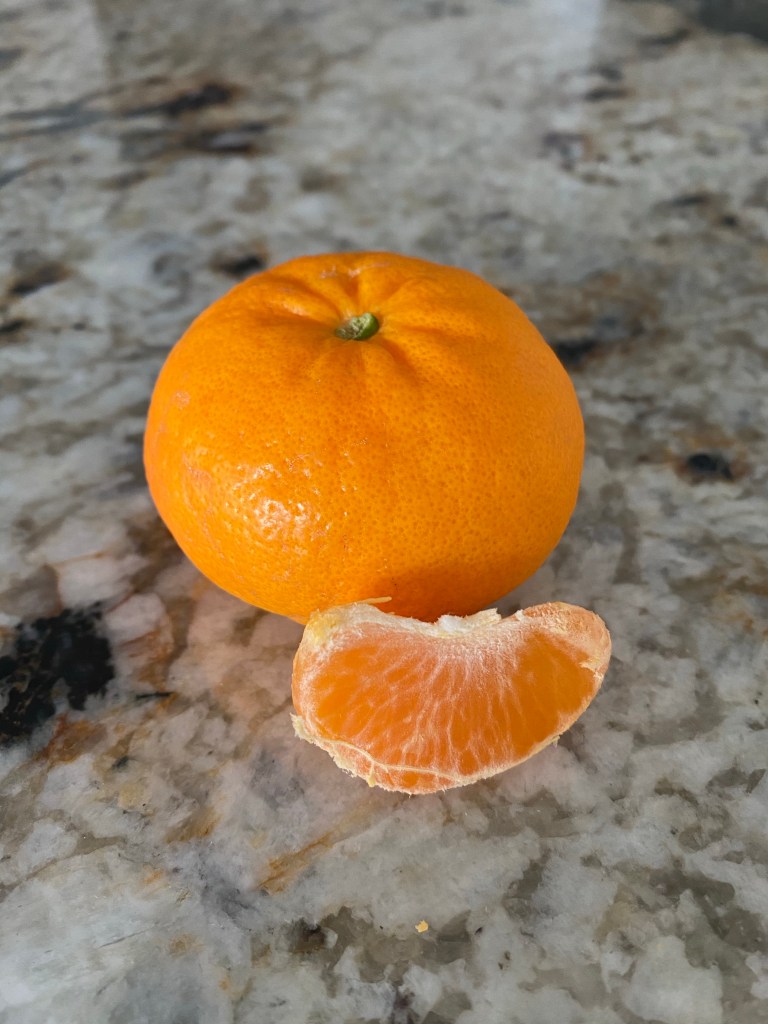
-Describe an orange with the 5 senses: After reading about the brain and 5 senses in literacy, I had my little use each of his senses to describe an orange- unpeeled, then peeled.
-Blood parts sensory play: What better way to teach the parts of the blood than by making it into a sensory play activity!? I mixed yellow water (plasma), red water beads (red blood cells), ping pong balls (white blood cells) and yellow foam blob shapes (platelets) in a cake pan and let my littles explore while I sang them a song I made up about the parts of the blood and their jobs. I got the play idea (then just made it a bit more scientific by adding plasma and platelets) from Living Life and Learning.

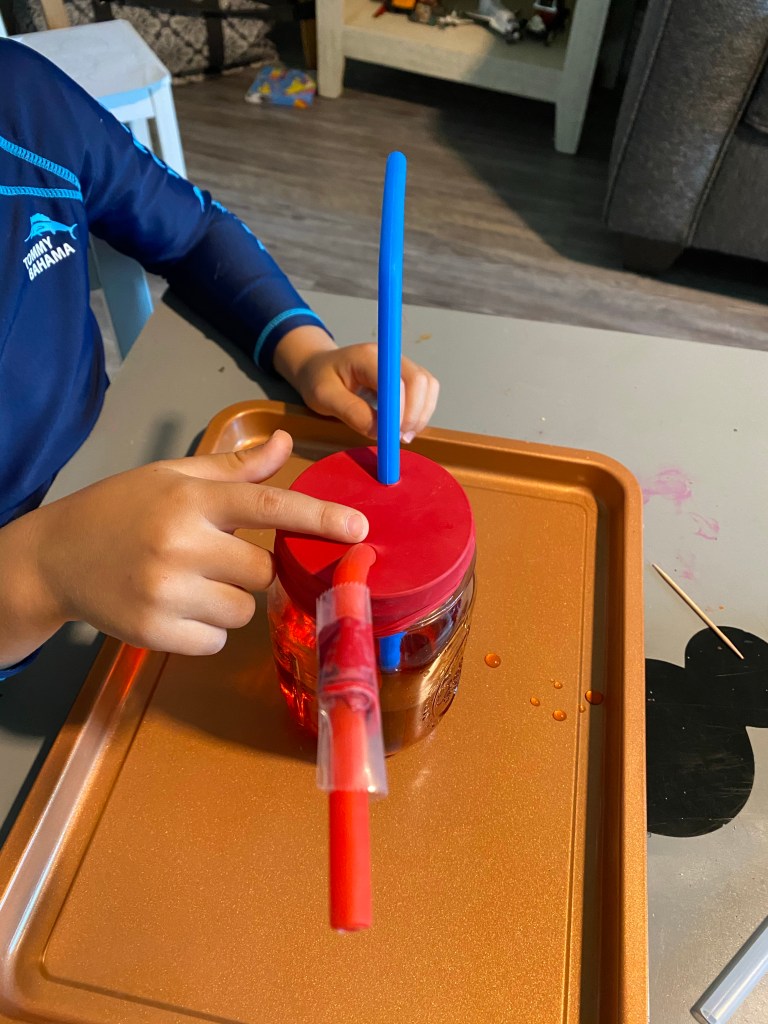
-Heart pump demo: OH MY GOSH you guys! This WORKED and was so cool! LoL So you fill a mason jar (or other sturdy cup) half full with water, add a little red food coloring, cut the neck off a balloon, stretch the balloon over the mouth of the jar, gently poke two holes in the balloon with a toothpick, and slide a straw in each hole (this took us 3 balloons because the straws kept ripping the hole too big…the straws have to fit snugly for the pump to work. I got it to work by making the holes slightly larger first by very gently wiggling the toothpick around in them THEN putting the straws in). Ok so this is your set up- to make the “heart” pump “blood” place the jar in a pan and have your little gently push the center of the balloon. “Blood” will pump out of the two “blood vessels” (straws) just like the heart pumps blood! I got this idea from Meghan Makes Do.
-Paper bag “lung” demo: This is a cool activity to show your little what lungs sort of look like inside your body as you breathe. To set it up, tuck a straw in the mouth of a paper lunch bag (I cut the bag down about 4 inches first because after trying it the first time with a full sized bag, we found it was much too large for my little to inflate and deflate with his breath since he’s small). Wrap the mouth of the bag around the straw and securely tape in place (masking tape, electrical tape or duck tape work well). Repeat with a second bag so you have two “lungs”. Give the lung models to your child and have them put the straws in their mouth and breathe in and out deeply (you might want to show them how to do it first). Talk about what the “lungs” look like as you breathe into them and out of them. You can also discuss that as the bag lungs inflate, your real lungs deflate because you’re blowing out your air into them and they are filling up. I got this activity from Living Life and Learning.

-Squishy body dissection culminating activity: As an end of the week activity I had my littles take apart then try to put back together this squishy human body model. As they worked we reviewed the different bones and organs that they took out and what they do for our bodies.

–Art:
-Circulatory system craft: On the day you read about the circulatory system, give your little a body outline printed on a piece of paper. Review how the heart pumps blood through the body in little tubes called blood vessels. Then have them stick a heart on the body (it can be a sticker left over from Valentine’s Day, or a construction paper heart) in the proper spot and glue red yarn around the body to represent blood vessels (veins and arteries).

-Healthy lung/smokers lung mosaics: I think it’s important to teach your children about the dangers of smoking young- my little has noticed people smoking on TV (can you believe all the characters who smoke in old cartoons!?) and in real life and although none of our close family members smoke, it’s something he’s talked about a lot and to my chagrin has pretended to do more than once. I thought this was a perfect opportunity to scare him out of it a bit- after all, I never tried smoking because of an anti-smoking lesson we saw on a field trip to the hospital where they put a cigarette in a doll named “Smokey Sue” and in 3 puffs her entire “lung” was covered with black! Yikes! If you want to skip this because you don’t think your little is ready for it, you can just do the healthy lung mosaic. So before doing the craft we talked about all the things smoking can do to your body (clog your blood vessels and cause your heart to stop working or prevent blood from flowing to your brain, cause throat and mouth cancer where bits of you have to be cut out, cause gum disease and tooth loss, cause lung cancer, kill off the little hairs that keep dirt and pollution out of your lungs so they actually fill up with dirt and dust, turn your lungs black with tar…) and I let him watch a few of the “tips from a smoker” commercials that the CDC and Surgeon General have produced- WARNING: these are very graphic and are not suitable for some young children. Preview them on your own first to make sure your little will be able to handle them. We paused after every commercial and I let him ask questions/we talked about what smoking had done to the person and how sad it was. After that lovely and uplifting conversation, I gave him a drawing of a lung and had him tear up pieces of black paper and glue them mosaic style in the lungs. I had his little brother use pink and red pieces I had cut out to make the healthy lung.

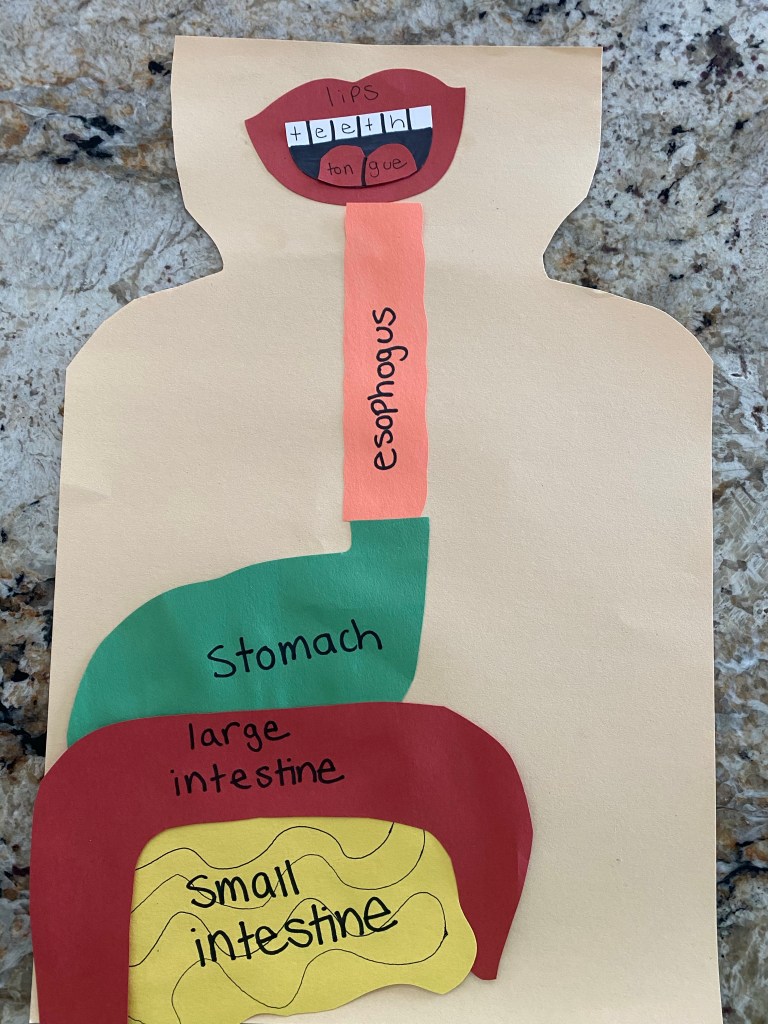
-Digestive system puzzle: I cut out all the pieces of the digestive system then had my little put them together and glue them in place on a head and body I had also cut out.
–Supply/shopping list:
- Usborne Complete Book of the Human Body (or other kid friendly body systems book)
- food from all food groups
- heart “beads”
- large paper roll (like butcher paper)
- red water beads (or red jello)
- ping pong balls
- Yellow craft foam
- orange
- mason jar or sturdy glass
- balloon
- toothpick
- 4 straws
- 2 paper bags
- red yarn
- squishy body model (optional)
